There’s something deeply satisfying about stepping out of the shower onto a bath mat you made yourself. I discovered this a few years ago when I got tired of replacing cheap store-bought mats that either fell apart or looked dingy after a few washes. My first DIY bath mat was a simple braided towel project, and honestly, it lasted longer than any $20 mat I’d ever bought.
Since then, I’ve experimented with everything from crochet designs to actual river rocks underfoot. Some projects worked beautifully, while others taught me valuable lessons the hard way (like realizing moss needs more maintenance than I was willing to give). Whether you’re looking to save money, match a specific bathroom aesthetic, or just enjoy a weekend craft project, making your own bath mat is easier than you’d think.
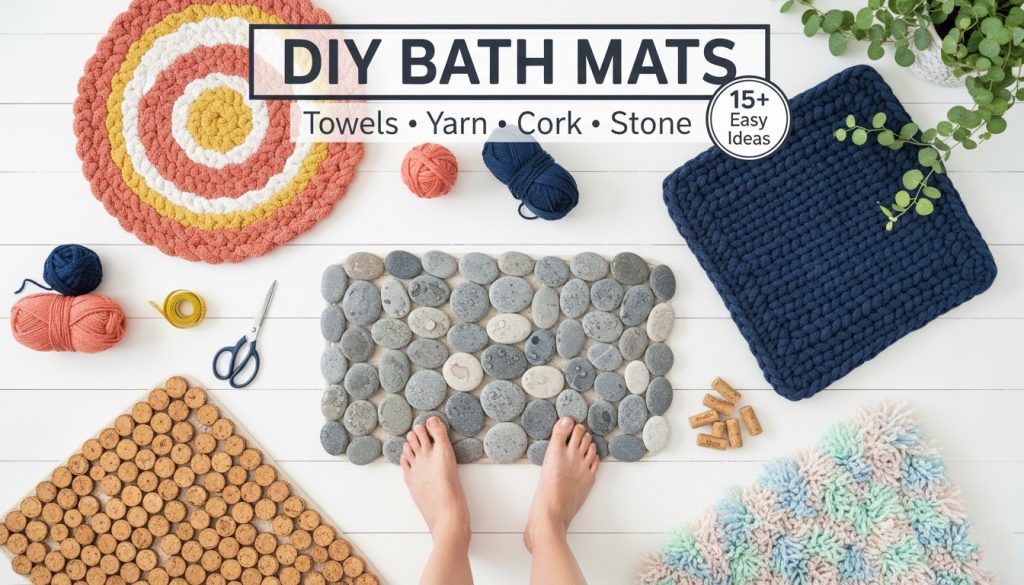
In this guide, I’ll walk you through multiple techniques using materials you probably already have at home, plus some nature-inspired designs that’ll make your bathroom feel like a spa. Let’s dive in.
Why Make Your Own Bath Mat?
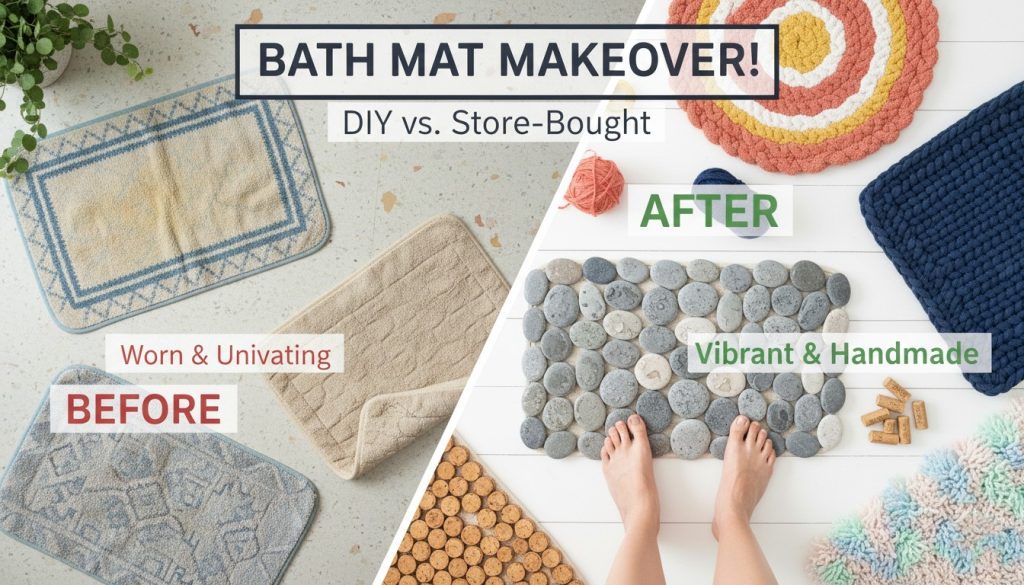
Before we get into the how-to part, let me tell you why this is worth your time. Store-bought bath mats have their place, but they’re often generic, wear out quickly, and sometimes slip around no matter what they claim on the packaging.
When you make your own, you control everything. You choose colors that actually match your bathroom instead of settling for “close enough.” You can make them thicker, softer, or more textured based on what feels good under your feet. Plus, if you’re using old towels or leftover yarn, you’re keeping stuff out of landfills while saving money.
I’ve also found that handmade mats hold up surprisingly well. My braided towel mat has survived three years of daily use and countless washing machine cycles. Compare that to the store-bought one I replaced every six months, and the time investment suddenly makes a lot of sense.
Safety First: Making Non-Slip Bath Mats
Here’s something I learned the embarrassing way: a beautiful bath mat that slides around is actually dangerous. After my first homemade mat sent me into an awkward stumble (thankfully I caught myself), I became obsessed with proper non-slip backing.
No matter which project you choose from this guide, you’ll need to address the slip factor. The easiest solution is non-slip rug pad material, which you can buy by the roll at any home improvement store. Cut it to size and place it under your finished mat. This works for almost any DIY design.
For a more permanent solution, you can use rubber backing spray or fabric-safe silicone. I’ve used Plasti Dip on several projects, applying it in lines or dots across the entire underside. It takes about 24 hours to cure, but once it’s dry, that mat isn’t going anywhere. Just make sure you do this in a well-ventilated area because the fumes are pretty strong.
If you’re sewing or gluing your mat, consider attaching a rubberized fabric backing from the start. I did this with my braided towel mat, and it’s held up beautifully through years of washing. The key is using an adhesive that remains flexible when dry, so it doesn’t crack and peel off.
How to Make a Bath Mat from Towels
This was my gateway project, and I still think it’s the best place for beginners to start. You probably have old towels sitting in your linen closet right now that are too worn for guests but too good to throw away. Perfect candidates.
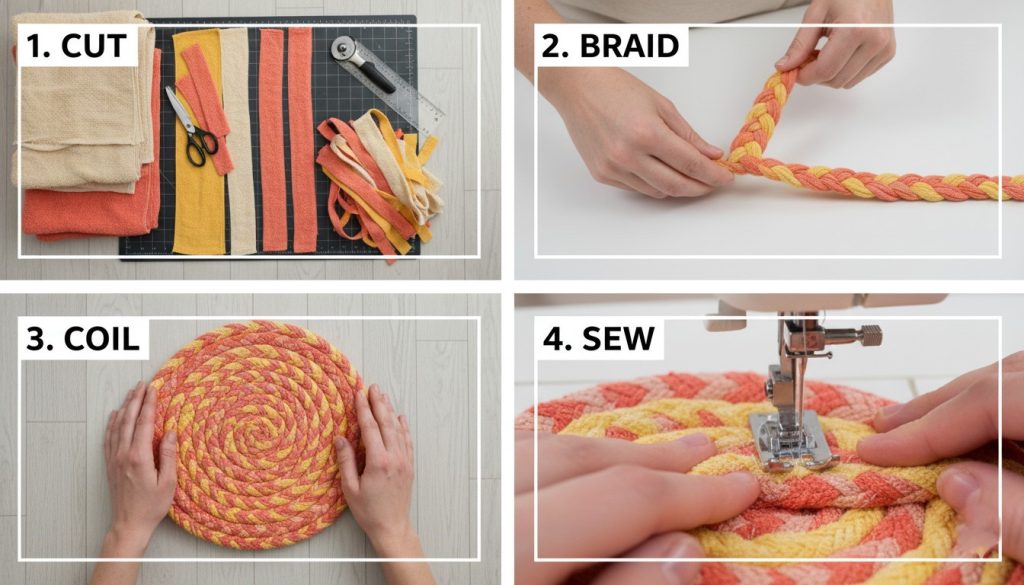
The braiding method is straightforward and oddly meditative. I usually do this while watching TV. Start by cutting your towels into long strips about three inches wide. You’ll need quite a few, so don’t be shy about raiding that towel collection. I used four large bath towels for a standard-sized mat.
Sew three strips together at one end, then start braiding just like you would hair. When you reach the end of a strip, simply sew another one onto it and keep going. The seams will be hidden inside the braid, so don’t worry too much about making them pretty.
Once you have a long braided rope, the fun part begins. Coil it into an oval or circle, sewing the coils together as you go. Use a heavy-duty needle and thread that matches your towel colors. I’ve found that dental floss actually works surprisingly well and is incredibly strong, though regular upholstery thread is fine too.
The finished product is wonderfully absorbent because, well, it’s made of towels. That’s literally their job. Mine has held up to weekly washing for years. I just toss it in with my regular laundry, and it comes out looking great every time.
If braiding isn’t your thing, you can also create a shaggy towel mat. Cut strips about one inch wide and six inches long, then tie them onto a rubber sink mat or piece of canvas using simple knots. This creates a fluffy, textured surface that feels amazing underfoot. I made one of these for my kids’ bathroom, and they love the squishy texture.
Creative Cork-Based Designs
Cork mats were my second obsession, and they’re particularly great if you want something that dries quickly and has natural antimicrobial properties. I’ve made two versions: one from wine corks and another from cork sheet material.
How to Make a Bath Mat from Wine Corks
Fair warning: this project requires patience and a lot of wine corks. I started collecting them about six months before I had enough for a mat. You can also buy them in bulk online, but where’s the fun in that?
You’ll need a solid base, and I recommend a rubber mat or a piece of marine plywood. I used a cheap rubber utility mat from the hardware store. Clean all your corks thoroughly with soap and water, then let them dry completely. Some people boil them, but I found this made them too soft and prone to crumbling.
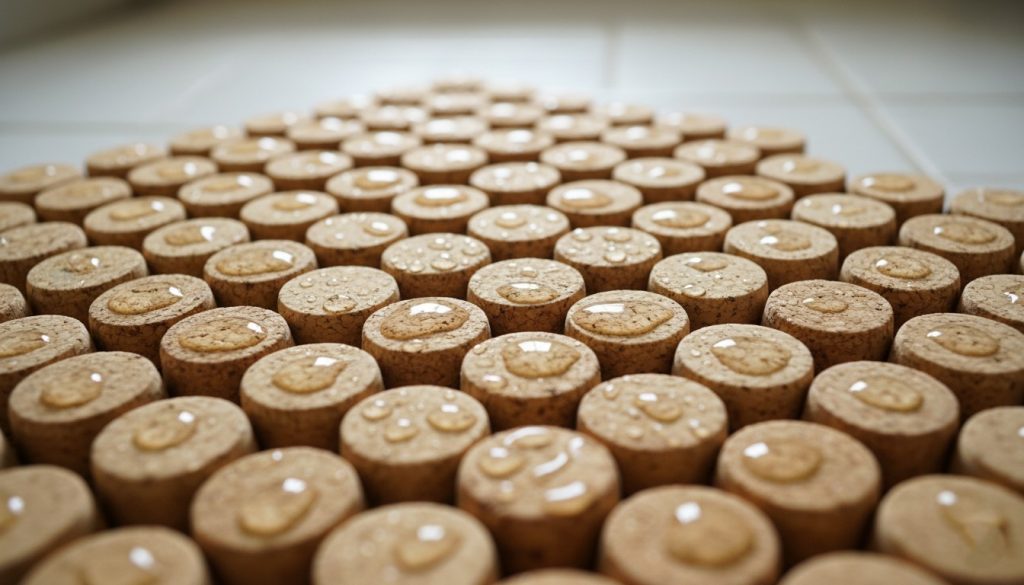
Arrange your corks standing upright (with the circular ends up) on your base material. Play with the pattern until you’re happy with it. I did a simple grid pattern for my first attempt, but you could get creative with spirals or alternating heights.
Use a strong waterproof adhesive like E6000 or marine epoxy. Apply it to the bottom of each cork and press firmly onto the base. Work in small sections so the glue doesn’t dry before you place all the corks. This part took me an entire afternoon, and my fingers were sticky for days despite wearing gloves.
Let it cure for at least 48 hours before using it. The cork surface feels incredible—it’s soft but firm, and it warms up quickly under your feet. Water beads right off it, and it dries faster than any fabric mat I’ve owned. The only downside is that it’s not particularly cushioned, so if you like a plush mat, this might not be for you.
How to Make a Bath Mat from Cork Sheets
This version is much faster if you don’t want to mess with individual corks. Cork sheets are available at craft stores and come in various thicknesses. I bought a half-inch thick sheet and simply cut it to the size I wanted with a utility knife.
The beauty of cork sheets is that they’re already water-resistant and naturally anti-slip on most bathroom floors. You can leave them plain or customize them with stencils and wood-burning tools. I burned a simple geometric pattern into mine, which sounds fancy but honestly just required tracing a template and going slowly with a wood-burning pen.
Cork sheet mats are lightweight and easy to clean—just wipe them down with a damp cloth. They’re also great for small bathrooms or travel because you can roll them up. I keep one in my gym bag for the locker room, and it’s held up perfectly.
How to Crochet Bath Mats
If you know basic crochet stitches, you can absolutely make a bath mat. I learned to crochet specifically for this project, and it took me about a week of evening practice before I felt comfortable starting the actual mat.
The key is choosing the right yarn. Cotton is ideal because it’s absorbent and machine washable. I used Lily Sugar’n Cream yarn for my first crocheted mat, which is inexpensive and comes in tons of colors. You’ll need a lot though—I used about eight balls for a standard-sized rectangular mat.
A larger hook makes the work go faster. I used a size K (6.5mm) hook, which created a nice, thick fabric. The simplest pattern is just rows of double crochet stitches. Start with a foundation chain as long as you want your mat to be wide, then work back and forth in rows until it reaches your desired length.

If you want more texture, try the popcorn stitch or loop stitch. I added loop stitches to one side of my mat for extra scrubbing power for your feet—it’s like a mini foot massage every time you step on it. Fair warning though: textured stitches take significantly longer to work up.
My crocheted mat went through a bit of a learning curve in the washing machine. The first time I washed it, it came out slightly misshapen. Now I always wash it in a mesh laundry bag on a gentle cycle, and it maintains its shape much better. I also lay it flat to dry rather than putting it in the dryer, which helps preserve the structure.
The best thing about crocheted mats is how customizable they are. You can make them any size, any color combination, and even add your initials or a simple pattern. My second one features stripes in my bathroom colors, and it looks like something from a boutique store.
How to Knit Bath Mats
Knitting produces a denser, flatter fabric than crochet, which some people prefer for bath mats. I’m more of a crocheter myself, but I made one knitted mat just to compare, and I was impressed with how sturdy it turned out.
You’ll want to use large needles (size 10 or 11) and the same cotton yarn I mentioned for crochet. The garter stitch (knitting every row) creates a thick, textured fabric that doesn’t curl at the edges, which is important for a bath mat. Seed stitch is another good option if you want a slightly different texture.
Cast on enough stitches to reach your desired width. For reference, I cast on 50 stitches with size 10 needles and worsted weight cotton yarn, which gave me a mat about 20 inches wide. Then just knit every row until it’s as long as you want it. It’s incredibly straightforward, which makes it perfect for mindless knitting while binge-watching your favorite shows.
The knitted fabric tends to be a bit thinner than crocheted fabric, so some people double it over and sew the layers together for extra thickness. I didn’t bother with mine, and it’s worked fine, though I did add rubber backing for grip.
One unexpected benefit: the knitted mat absorbed water better than my crocheted one. I think the denser fabric holds more moisture. Of course, this means it also takes longer to dry, so it’s a trade-off depending on your priorities.
How to Weave Bath Mats
Weaving a bath mat sounds complicated, but it’s actually quite primitive and forgiving. You don’t need a fancy loom—I made my first one using a simple cardboard frame that I cut notches into. It worked surprisingly well.
The basic concept is creating a warp (vertical threads) and then weaving your weft (horizontal threads) over and under. For a bath mat, you want to use thick, sturdy materials. I used cotton rope for the warp and strips of old t-shirts for the weft, which created a rag-rug style mat.
If you want to invest in proper equipment, a peg loom or frame loom makes the process faster and produces more consistent results. I eventually bought a simple square frame loom from a craft store for about thirty dollars, and I’ve made several mats on it.
The weaving process itself is meditative. There’s something rhythmic about passing the weft over and under, over and under. It took me about four hours to complete a two-by-three-foot mat, working at a leisurely pace. The fabric you create is incredibly durable because of all the interlocking threads.
My woven mat is thicker and more textured than any of my other fabric mats. It’s also quite heavy, which means it stays in place even without additional non-slip backing. The weight comes from the density of the weave, and it makes the mat feel substantial and high-quality.
How to Make a Bath Mat from Fabric
Beyond weaving, there are several other ways to transform regular fabric into a functional bath mat. The method you choose depends on what materials you have and how much sewing you want to do.
The rag rug technique is probably the most popular. Cut fabric into long strips, braid them just like the towel method I described earlier, and coil them into a mat. The difference is that regular fabric is less absorbent than towels, so you might want to line the underside with a layer of terry cloth or use it in a bathroom where you want something decorative rather than super functional.
I made a quilted fabric mat by layering several pieces of cotton fabric with a thick batting in between. I quilted through all the layers in a simple grid pattern, which not only held everything together but also created a nice cushioned feel. This mat is more decorative than absorbent, so I use it in my guest bathroom where it doesn’t get daily shower traffic.
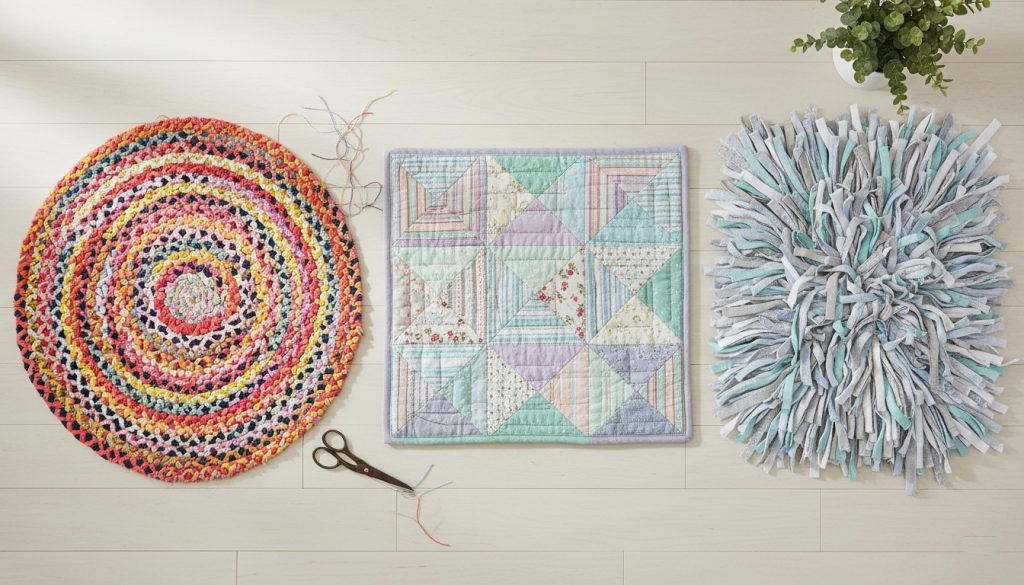
Another option is creating a shaggy mat by tying fabric strips to a canvas base. This works great with old t-shirts. Cut them into strips about an inch wide and four inches long, then tie each strip through the weave of a canvas cloth. Pack them close together for a fluffy effect. This was actually my first-ever DIY bath mat project, and while it’s not the most absorbent option, it’s incredibly soft and comfortable.
The key with any fabric mat is considering absorbency. Some fabrics shed water rather than absorbing it, which defeats the purpose of a bath mat. Cotton, terry cloth, and bamboo fabrics work best. I learned this after making a mat from polyester fabric that basically created a puddle on top of it rather than soaking up water.
How to Make a Bath Mat from Yarn
Yarn opens up endless possibilities beyond crochet and knitting. One of my favorite techniques is making a pom-pom mat, which sounds ridiculous but is actually adorable and functional.
To make pom-poms, wrap yarn around your fingers or a pom-pom maker (I use a cardboard template I made myself) about 50 times. Tie a tight knot around the center, cut through the loops on both sides, and fluff. Trim any uneven edges until you have a nice, round pom-pom. You’ll need a lot of these—I made about 50 for a small mat.
Attach the pom-poms to a rubber mat or grippy shelf liner using a needle and thread. Push the needle through the mat, then through the center knot of the pom-pom, and back through the mat. Tie it off securely on the underside. Pack your pom-poms close together so you can’t see the base underneath.
The result is a fluffy, cloud-like mat that’s surprisingly absorbent. The yarn traps water between the pom-poms, and it dries relatively quickly if you hang it up. It’s also machine washable, though I use a gentle cycle and low heat in the dryer to prevent the pom-poms from losing their shape.
T-shirt yarn (or fabric yarn) is another excellent option for yarn-based mats. You can buy it or make it yourself by cutting old t-shirts into continuous strips. It’s thicker and sturdier than regular yarn, which makes it perfect for quick projects. I finger-knitted a simple mat with t-shirt yarn in about two hours—no needles required, just your hands.
Shag-style yarn mats use a latch hook technique. You can buy latch hook canvas and cut yarn into short pieces, then hook them through the canvas to create a thick, shaggy surface. This was popular in the 1970s and is making a comeback. I haven’t made one myself yet, but my friend has one in her bathroom, and it looks professionally made.
Making a Pebble Bath Mat
Now we’re getting into the nature-inspired projects that really make a statement. A pebble bath mat brings that spa-like experience right into your home, and I genuinely love stepping onto mine. It’s like a foot massage every single day.
You’ll need smooth pebbles, which you can collect from a beach or riverbank, or buy from a garden supply store. I bought mine because I wanted uniformity in size, and they came pre-washed. Get enough to cover your mat area—I used about 150 pebbles for a mat that’s roughly 15 by 24 inches.
For the base, I used a rubber utility mat with drainage holes. Some people use marine plywood, but I wanted something that wouldn’t rot with moisture exposure. Plus, the rubber mat was already flexible and easy to cut to size.
Arrange your pebbles on the mat first before gluing anything. This lets you play with the pattern and make sure you have enough stones. I organized mine by size, placing larger pebbles around the edges and smaller ones filling in the center, which created a nice, organic look.
Use a strong, waterproof adhesive like marine epoxy or construction adhesive. Apply it to the bottom of each pebble and press firmly onto the mat. Work in small sections, and don’t rush this part. I made the mistake of doing too many at once on my first attempt, and the glue started drying before I finished arranging them properly.

Let the mat cure for at least 72 hours before using it. The first time I stepped on mine, I honestly felt like I was standing in a creek. The stones are cool and smooth, and they conform slightly to the shape of your feet. It’s a completely different sensory experience from fabric mats.
The pebbles do take some getting used to. The first few times, it felt a bit uncomfortable, almost like walking on a bumpy surface. But after a week, my feet adjusted, and now I find it genuinely relaxing. Some people find it too intense, though, so it’s not for everyone.
Maintenance is simple: just rinse it off in the shower or spray it with the showerhead every few days. The pebbles dry quickly because water doesn’t pool between them. I’ve had mine for two years, and only one pebble has come loose, which I just reglued.
Creating a River Rock Bath Mat
River rocks are similar to pebbles but typically larger and flatter. The mat I made with river rocks is in my outdoor shower, and it’s been fantastic for creating that natural, rustic feel.
The construction process is almost identical to the pebble mat, but the larger stones mean you’ll need fewer of them. I used about 70 river rocks for a similar-sized mat. The bigger surface area of each stone means more surface touching your feet, which some people find more comfortable than the smaller pebbles.
One thing to consider is weight. My river rock mat is significantly heavier than my pebble mat. This is great for stability—it absolutely will not slide around—but it also means it’s not easy to move or clean under. I basically consider it a permanent fixture.
I experimented with creating a mosaic-style arrangement with my river rocks, mixing in some darker and lighter stones to create a pattern. It took more planning than my pebble mat, but the result looks much more intentional and decorative. If you’re going this route, definitely lay out your entire design before gluing anything down.
The flat shape of river rocks means they stack really well if you want to create different heights. I didn’t go this route for safety reasons, but I’ve seen some beautiful artistic mats that incorporate varying stone heights for visual interest.
How to Make a Stone Bath Mat
“Stone” is kind of a catch-all category, and you can get creative here. I’ve seen mats made with slate tiles, marble chunks, and even decorative stones from landscaping centers. The key is choosing stones that are smooth enough to be comfortable underfoot but textured enough to provide grip.
For my stone mat, I used flat slate tiles cut into irregular shapes. I bought one large slate tile from a home improvement store for about twelve dollars, then broke it into pieces using a hammer and towel (wrap the tile in a towel before hitting it to contain the pieces and protect yourself from sharp edges).
The irregular shapes created a natural mosaic look that I really love. I arranged them on a plywood base, leaving small gaps between each piece for a more organic appearance. Some people fill these gaps with grout, like you would with actual tile, which creates a smoother surface. I left mine as is, and it’s worked fine.
The slate stays cool, which is refreshing in the summer but a bit chilly in winter. If you’re in a cold climate, you might want to consider this. I’ve thought about adding radiant heating underneath it, but that seems like overkill for a bath mat.
Cleaning stone mats is straightforward—just wipe them down or spray them off. The natural stone doesn’t harbor bacteria the way fabric can, which is a nice bonus. After two years of use, my slate mat looks almost exactly the same as the day I made it.
DIY Moss Bath Mat Project
Okay, I need to be honest here: the moss bath mat is the one project I abandoned. It sounds amazing in theory—a living, green mat that feels like walking on forest floor—but the reality didn’t match my lifestyle.
The concept is creating a base with proper drainage, filling it with a growing medium, and establishing live moss on top. You can also use preserved moss, but where’s the fun in that? I used a plastic boot tray with drainage holes, filled it with a thin layer of gravel and then moss-specific soil, and planted live sheet moss on top.
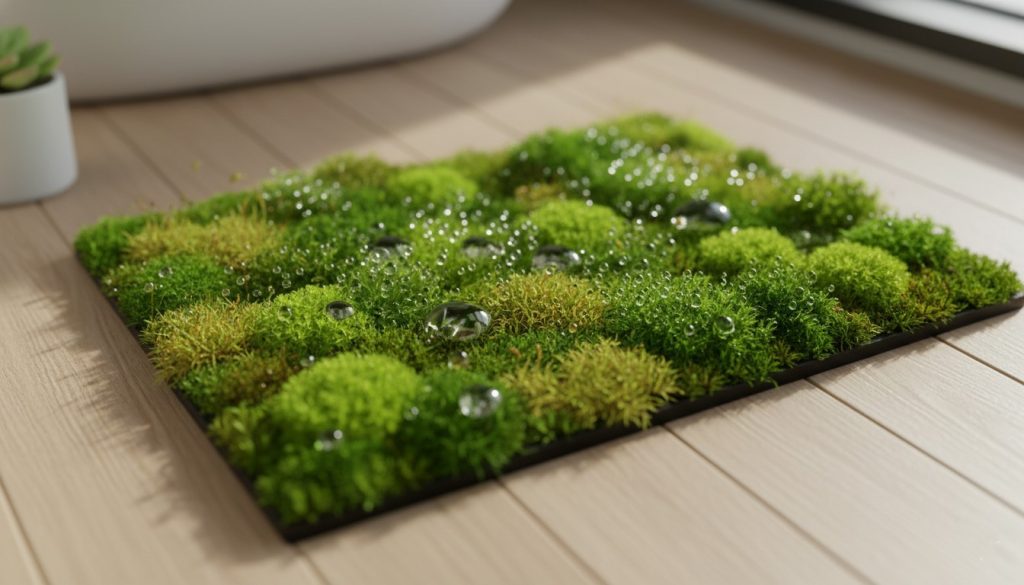
For about three weeks, it was absolutely magical. The moss was soft and cool, and it did make my bathroom feel like a zen spa. The moisture from my feet after showering was supposed to be enough to keep the moss alive, which worked initially.
But here’s where I ran into problems: moss needs indirect light to survive. My bathroom has one small window that doesn’t provide enough light, so the moss started dying. I tried moving it near the window between showers, but honestly, that became too much work. I also underestimated how much drainage it needed. Water would pool underneath, and I had to empty the tray frequently to prevent mildew.
If you have a bathroom with good natural light and proper ventilation, a moss mat can work. You need to mist it lightly if it’s not getting enough moisture from regular use, and you might need to rotate it outside occasionally for some sun exposure. It’s more of a commitment than I realized.
Preserved moss is a lower-maintenance alternative. It’s been treated to stop growing, so it doesn’t need light or water. However, it will eventually dry out and become brittle if it gets too much direct water exposure. Some people coat preserved moss with a sealant to protect it, but then it doesn’t feel soft and natural anymore.
I ultimately composted my moss mat and went back to my trusty towel braid. But I know people who’ve made it work, and they absolutely love it. It’s just not a project for someone who wants a set-it-and-forget-it bath mat.
Finishing Touches and Customization
No matter which project you choose, there are ways to make it uniquely yours. I’ve experimented with various customization techniques over the years, and these are my favorites.
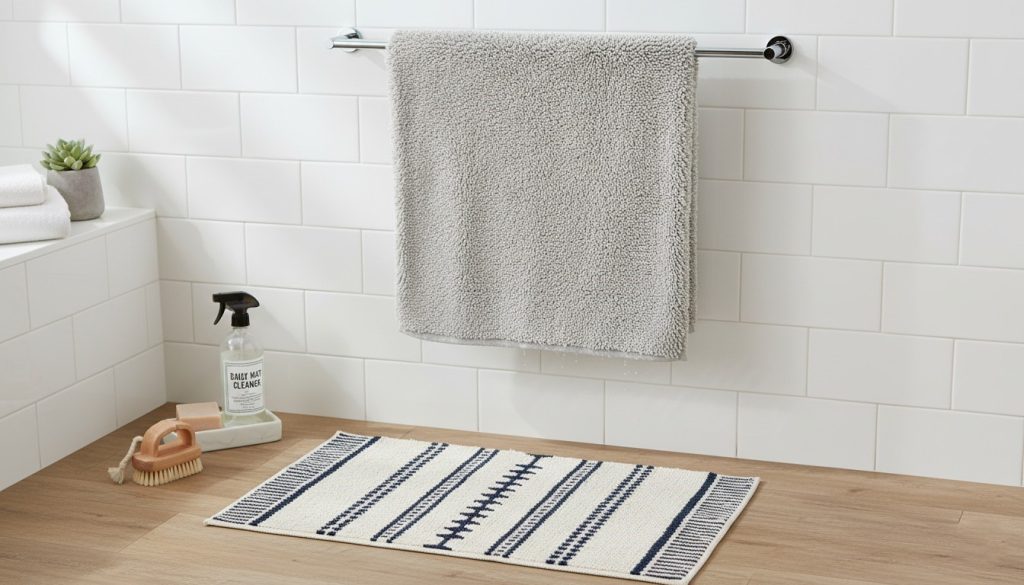
Color coordination is the easiest way to make your mat feel intentional. I’ve made mats specifically to match bathroom towels, shower curtains, or tile colors. My current bathroom has a gray and yellow color scheme, so I made a crocheted mat with alternating stripes of charcoal and golden yellow yarn. It ties the whole room together.
Monograms or simple patterns can be added to fabric or yarn mats. I used fabric paint to add my initial to one corner of my quilted mat. For crocheted or knitted mats, you can work a simple color change into the pattern to create geometric designs.
Mixing materials creates interesting visual and textural contrasts. One of my favorite mats combines the towel braiding technique with fabric strips, alternating between plush towel material and smooth cotton fabric. The different textures create a subtle pattern that’s more interesting than a single-material mat.
Protective treatments are important for longevity, especially with natural materials. I spray my cork mats with a clear acrylic sealer every six months to maintain their water resistance. For fabric mats, a fabric protector spray can help repel stains and make them easier to clean.
Waterproofing spray is essential if you’ve made a mat from materials that aren’t naturally water-resistant. I learned this after my first fabric mat started developing mildew in the areas that stayed damp. Now I spray any fabric-based mats with a water-repellent spray designed for outdoor fabrics, and I haven’t had issues since.
Care and Maintenance Guide
Taking care of your DIY bath mat properly will extend its life significantly. I’ve learned through trial and error what works and what definitely doesn’t.
For fabric-based mats (towel, crochet, knit, weave, yarn), machine washing works well, but use gentle cycle and cold water. Hot water can cause cotton to shrink unevenly, which I discovered when my first crocheted mat came out misshapen and wavy. I also always use a mesh laundry bag now to protect the mat from getting caught on the agitator or other clothes.
Air drying is better than machine drying for maintaining shape, though I’ll admit I sometimes cheat and use low heat if I need the mat quickly. High heat can damage rubber backing and cause yarn to felt, so avoid it.
Cork and stone mats just need wiping down with a damp cloth. I do a deeper clean monthly by spraying them with a bathroom cleaner and rinsing them off in the tub. The non-porous surface means bacteria and mildew don’t penetrate like they can with fabric.
Drying recommendations matter more than I initially thought. Even absorbent mats need time to dry between uses. I hang my fabric mats over the side of the tub or shower door after I’m done using them, which helps them dry faster and prevents that musty smell. In humid climates, you might need to bring your mat outside occasionally to dry in the sun.
Mildew prevention is crucial, especially for thick, absorbent mats. I add a half-cup of white vinegar to the rinse cycle when washing my fabric mats, which helps kill any mildew spores and eliminate odors. For stone and cork mats, proper drainage prevents mildew from becoming an issue in the first place.
When to replace depends on the material. My fabric mats typically last two to three years before they start looking worn or losing absorbency. Stone and cork mats can last indefinitely if properly maintained. If your mat starts smelling musty even after washing, develops stubborn stains, or loses its shape, it’s probably time for a new one.
Storage isn’t usually necessary since most people use their bath mats year-round. But if you’ve made seasonal mats (I have a festive one for winter holidays), make sure they’re completely dry before storing. I roll fabric mats and keep them in a breathable cotton bag, never plastic, which can trap moisture and cause mildew.
Troubleshooting Common Issues
Over the years of making and using DIY bath mats, I’ve encountered pretty much every problem possible. Here’s how to fix them.
Mat sliding or bunching is the most common issue. If your non-slip backing isn’t working, try a different product. I’ve found that rubber backing sprays work better than pads for irregularly shaped mats. For particularly problematic mats, I’ve used small pieces of double-sided carpet tape in the corners, though this isn’t ideal for mats you wash frequently.
Odor issues usually indicate mildew growth or insufficient drying. The fix is washing with vinegar, ensuring complete drying between uses, and possibly using a fan in your bathroom to improve air circulation. I had one mat that developed a persistent smell, and I finally realized it was too thick and wasn’t drying completely. I ended up making a thinner version, and the problem disappeared.
Color fading happens with any dyed material that gets wet frequently and exposed to cleaning products. Using color-safe detergent helps, as does washing in cold water. I’ve also started treating my more vibrant fabric mats with a color-set product after making them, which has helped preserve the colors longer.
Structural repairs are sometimes necessary, especially with handmade items. I’ve re-sewn loose sections of braided mats, reglued stones that came loose, and even patched holes in crocheted mats. The nice thing about making your own mat is that you know how it’s constructed, so repairs are usually straightforward.
If your mat develops thin spots or breaks down in high-traffic areas, you can reinforce those sections. I’ve done this by stitching additional layers of fabric underneath worn areas or adding extra coils to a braided mat. It’s not always pretty on the underside, but the top looks fine, and it extends the mat’s life.
Making Your Choice: Which Project Is Right for You?
After making nearly a dozen different bath mats over the past few years, I’ve developed some opinions about which projects work best for different situations.
If you’re a complete beginner and want something simple that works, start with the braided towel mat. It requires minimal tools (just scissors, a needle, and thread), uses materials you probably already have, and is nearly impossible to mess up. Plus, it’s genuinely functional and long-lasting.
For crafters who already knit or crochet, making a yarn mat is a natural next step. It lets you practice your skills while creating something practical. The cotton yarn is easy to work with, and even if your tension isn’t perfect, the mat will still function fine.
If you want something unique and conversation-worthy, go for one of the natural material projects. My pebble mat gets more compliments than any other DIY project I’ve ever made. It’s definitely a statement piece, and it makes my bathroom feel spa-like.
For quick weekend projects, the cork sheet mat wins. It took me less than an hour to make, and it’s been completely maintenance-free. If you’re not crafty but want a handmade mat, this is your project.
The moss mat is only for people who genuinely enjoy caring for plants and have the right bathroom conditions. If you killed your last succulent, skip this one.
Budget-wise, the towel and fabric projects cost almost nothing since you’re upcycling materials. The stone and cork projects require purchasing materials, but they’re still cheaper than high-end bath mats. My pebble mat cost about $25 in materials, and similar ones sell for $80+ online.
Time investment varies wildly. Cork sheet mats take under an hour. Pebble mats take an afternoon. Crocheted or braided mats can take several days depending on your pace. Choose based on how much time you want to commit.
Final Thoughts
Making your own bath mat has become one of my favorite practical craft projects. There’s something satisfying about creating something you use every single day, knowing it’s unique to your home.
I encourage you to start with whatever materials you already have on hand. Raid your linen closet for old towels, dig through your craft stash for leftover yarn, or take a walk and collect some smooth pebbles. The best first project is the one you can start immediately without buying anything.
Don’t worry about perfection. My first towel mat was lumpy and uneven, but it still worked perfectly and lasted for years. The beauty of handmade items is that they have character and tell a story.
Beyond the practical benefits of saving money and customizing your bathroom, there’s an environmental angle here too. Repurposing towels and fabric keeps them out of landfills. Using natural materials like cork and stone means you’re not buying synthetic mats that will eventually end up in a trash heap. Every small choice adds up.
I’ve genuinely enjoyed experimenting with these different techniques, and my bathroom has become a showcase of my various creations. Different mats rotate through as the seasons change or as I feel inspired to try something new. It’s become a creative outlet that also happens to be functional, which is the best kind of craft project.
So grab those old towels, order some pebbles, or pull out your crochet hooks. Your feet will thank you every time you step out of the shower onto something you made yourself.
Leave a Reply