Let me be honest with you. I ignored my bath mat for way too long. You know that slightly slimy feeling when you step on it? Yeah, I lived with that for months before realizing I was basically creating a science experiment in my bathroom. If you’re reading this, you’re probably in the same boat I was, wondering how to clean bath mat properly without ruining it or spending hours scrubbing.
After dealing with stubborn mold, mysterious pink stains, and suction cups that suddenly refused to stick, I’ve learned everything there is to know about keeping these essential bathroom accessories fresh and functional. This is The Complete Cleaning Guide for Non-Slip Bath Mats that I wish someone had handed me years ago.
Why Your Bath Mat Gets So Disgusting (And Why You Should Care)
Here’s what I learned the hard way. Your bath mat sits in the perfect environment for bacteria and mold growth. It’s constantly wet, warm, and covered in soap residue and dead skin cells. Appetizing, right?
I started noticing a musty smell in my bathroom that wouldn’t go away no matter how much air freshener I used. Turns out, the culprit was hiding in plain sight under my feet every morning. Once I committed to regular cleaning, not only did the smell disappear, but my mat actually stayed grippy and safe to use.
How Often Should You Really Clean Your Bath Mat?
Most people think washing their bath mat once a month is sufficient. I thought the same thing until I noticed orange-pink patches appearing within two weeks. Those are bacterial colonies, by the way, not just discoloration.
For everyday maintenance, I rinse my mat with hot water after every few showers. This simple habit makes a huge difference. Once a week, I do a proper deep clean. If you live in a humid climate like I do, or if multiple people use the same bathroom, you might need to clean it even more frequently.
The Weekly Quick Clean: My Go-To Method
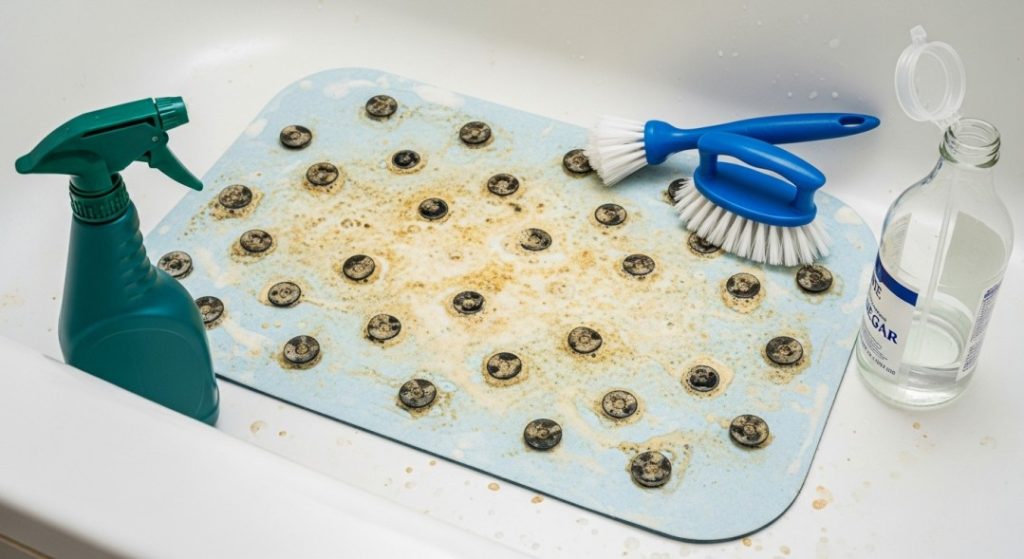
This is my standard routine for keeping things fresh without dedicating my entire afternoon to bath mat maintenance. First, I remove the mat and rinse both sides thoroughly with the hottest water my hands can handle. You’d be amazed at how much soap scum and residue comes off with this step alone.
Next, I spray the entire surface with a mixture of equal parts white vinegar and water. I let this sit for about ten minutes while I’m brushing my teeth or doing other bathroom tasks. The vinegar breaks down soap buildup and helps prevent bath mat mold from taking hold.
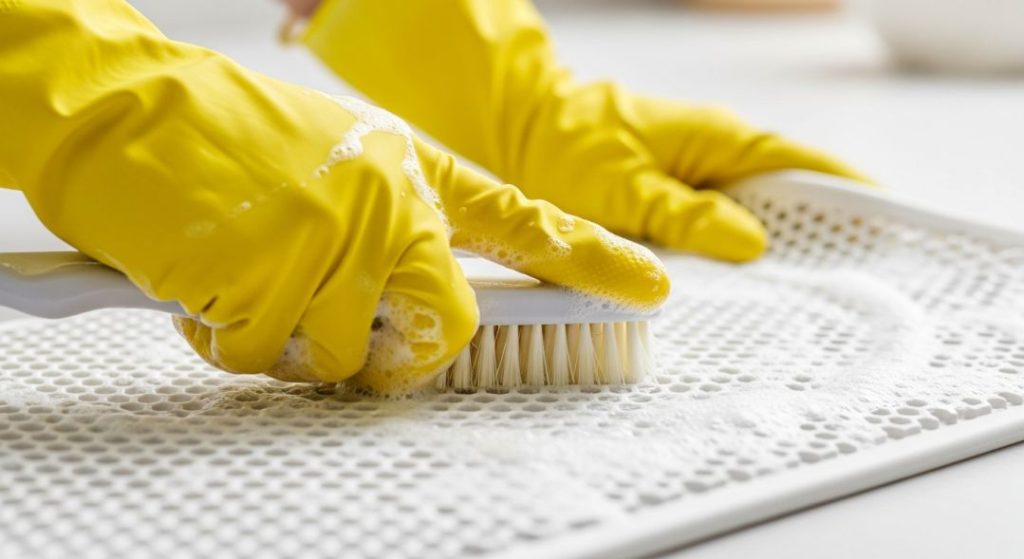
After the vinegar has done its job, I use a soft-bristled brush to gently scrub the entire mat, paying special attention to the textured areas where grime loves to hide. I learned not to use anything too abrasive because it can damage the non-slip coating. A regular dish brush works perfectly.
Finally, I rinse everything thoroughly and hang the mat over my shower rod or bathtub edge to dry completely. This air-drying step is crucial. Rolling it up wet or laying it flat is basically inviting mold to move in.
Deep Cleaning: When Your Mat Needs Extra Love
About once a month, or whenever I notice my mat looking dingy despite regular cleaning, I break out the big guns. This is the most effective method I’ve found for washing non slip shower mat thoroughly.
I fill my bathtub with hot water and add half a cup of baking soda and half a cup of white vinegar. Yes, it fizzes up like a grade school volcano project, but this combination is incredible at breaking down built-up grime. I submerge the mat completely and let it soak for at least 30 minutes, sometimes up to an hour if it’s particularly gross.
While the mat is soaking, I use this time to clean the bathtub surface where the mat normally sits. There’s always a ring of residue there that needs attention. Once the soaking time is up, I drain the tub and give the mat a thorough scrub on both sides.
For really stubborn stains, I make a paste with baking soda and a little water, apply it directly to the problem areas, and let it sit for another 15 minutes before scrubbing. This paste method has saved me from having to replace mats that I thought were beyond help.
How to Remove Mold from Bath Mat: The Nuclear Option
I’m not going to sugarcoat this. If you’ve let things go too far and you’re dealing with visible black or green mold, you need to act decisively. I’ve been there, and bath mat mildew removal requires a more aggressive approach than regular cleaning.
My method involves mixing one part bleach with four parts water in a well-ventilated area. I always wear gloves for this and make sure my bathroom window is open. I apply this solution specifically to the moldy areas using a sponge, being careful not to splash it on myself or surrounding surfaces.
Let the bleach solution sit for about ten minutes, but don’t let it dry on the mat. The smell is pretty strong, so I usually step out of the bathroom during this waiting period. After ten minutes, I scrub the areas with a brush, rinse extremely thoroughly with cold water to neutralize the bleach, and then do a final rinse with hot water.
I only use this bleach method as a last resort because it can potentially damage the rubber over time and weaken those suction cups we rely on for safety. If your mat has reached this stage multiple times, it’s honestly probably time for a replacement.
The Suction Cup Problem: Why They Stop Working
This frustrated me for the longest time. I’d clean my bath mat, put it back down, and suddenly it would slide around like it was on ice. The problem wasn’t the mat itself but how I was cleaning those crucial suction cups.
Bath mat suction cups cleaning requires specific attention. Soap residue and mineral deposits from hard water build up around the rim of each suction cup, preventing them from creating a proper seal. I now make sure to clean each individual suction cup with a small brush or even an old toothbrush.
I also learned that suction cups need to be completely dry before you apply the mat back to the tub surface. I used to slap the wet mat right back down after cleaning, wondering why it wouldn’t stick. Now I dry each suction cup with a clean towel, and I also wipe down the tub surface where the mat will go. Both surfaces need to be clean and dry for maximum grip.
One more trick that changed everything for me: after cleaning and drying, I press down firmly on each suction cup to make sure it’s properly sealed. This takes an extra minute, but it’s worth it for the peace of mind knowing the mat won’t slip when I’m standing on it soapy and vulnerable.

Machine Washing: Yes or No?
I get asked this all the time. Can you just throw your non-slip bath mat in the washing machine and call it a day? The answer is complicated and depends on your specific mat.
I’ve tried machine washing with several different mats over the years. Some held up fine, while others came out warped or with damaged suction cups. The key is checking the manufacturer’s label first. If it says machine washable, great. If not, don’t risk it.
When I do machine wash, I always use cold water on a gentle cycle and add about half the detergent I’d normally use. Too much detergent leaves residue that actually makes the mat more slippery. I never use fabric softener because it creates a coating on the rubber that destroys the grip.
The dryer is absolutely off-limits for clean rubber bath mat materials. The heat will warp the mat, shrink it, or damage the non-slip coating. I learned this lesson with a $30 mat that came out looking like a Salvador Dali painting. Always air dry, no exceptions.
Honestly though, I prefer hand cleaning for bath mats. It gives me better control, and I can inspect for any damage or wear that might make the mat unsafe to use.
Preventing Future Buildup: Small Habits That Make a Big Difference
After months of trial and error, I’ve developed a routine that keeps my mat cleaner between deep cleanings. These small habits have seriously reduced my scrubbing time.
After every shower, I lift the mat and rinse both sides quickly with the shower spray. This 30-second habit prevents soap and shampoo residue from hardening onto the surface. I also make sure to squeegee or wipe down the tub area around where the mat sits.
Once or twice a week, I hang the mat up to dry completely instead of leaving it on the tub floor. This prevents that constant moisture that mold absolutely loves. I just drape it over the shower rod or towel bar for a few hours.
I also installed a bathroom exhaust fan on a timer, which has been a game-changer for prevent bath mat mold. The fan runs for 20 minutes after every shower, pulling out all that humid air before it can settle on surfaces. If you don’t have an exhaust fan, at least crack a window or door to improve air circulation.
When to Give Up and Buy a New Mat
I’m all about extending the life of household items, but safety comes first with non-slip bath mats. I replace mine when I notice any of these warning signs, no matter how much cleaning I do.
If the suction cups are cracked, torn, or no longer create a seal even after thorough cleaning, that’s a deal-breaker. I also look for any rips or tears in the mat surface, discoloration that won’t come out despite multiple cleaning attempts, or a persistent musty smell that lingers even after deep cleaning.
The texture matters too. If the non-slip surface feels smooth or slippery even when clean and dry, the coating has worn away and it’s time for a replacement. I learned this after nearly taking a nasty fall on a mat I’d kept too long.
Most quality non-slip bath mats last between six months to two years with proper care. Mine tend to last closer to the two-year mark now that I’ve got my cleaning routine dialed in.
My Favorite Cleaning Products (That Actually Work)
After trying everything under the sun, I’ve settled on a pretty simple arsenal. White vinegar is my MVP for regular cleaning. It’s cheap, non-toxic, and effective at breaking down soap scum and preventing mildew. I buy it by the gallon now.
Baking soda is my second essential for tackling stains and odors. Together, vinegar and baking soda handle about 90% of my bath mat cleaning needs. For the other 10%, I keep a bottle of hydrogen peroxide around. It’s gentler than bleach but still effective for remove mold from bath mat when caught early.
I also invested in a good scrub brush with soft bristles that won’t damage the mat surface. The one I use has a long handle so I don’t have to get on my hands and knees in the tub, which my back definitely appreciates.
The Bottom Line on Bath Mat Maintenance
Looking back at my journey from bath mat neglect to bathroom hygiene champion, I realize that The Complete Cleaning Guide for Non-Slip Bath Mats really comes down to consistency over intensity. You don’t need fancy products or hours of scrubbing time. You just need to establish a routine and stick with it.
My weekly quick cleans take maybe five minutes, and my monthly deep cleans take about 30 minutes including soaking time. That’s a small investment to avoid the grossness I used to deal with and to keep my bathroom actually safe to use.
The biggest mindset shift for me was realizing that my bath mat isn’t just decor or a luxury item. It’s a safety device that literally prevents injuries. Keeping it clean isn’t just about appearances or avoiding icky feelings. It’s about maintaining the grip and functionality that keeps me from slipping and falling.
So if your bath mat is currently giving you that slightly slimy vibe when you step on it, or if you’re seeing the first signs of pink or black spots, don’t wait like I did. Grab some vinegar, clear 30 minutes on your calendar, and give your mat the attention it deserves. Your future self will thank you, and your bathroom will smell a whole lot better.
Leave a Reply